Active Directory
Setting Up an Active Directory Domain Controller with Samba
This guide walks you through setting up an Active Directory Domain Controller using Samba on a Debian host.
[!note]
At the time of writing, the latest Debian release is Debian 13 (Trixie), which can be downloaded from the official website.
1. Creating the VM
-
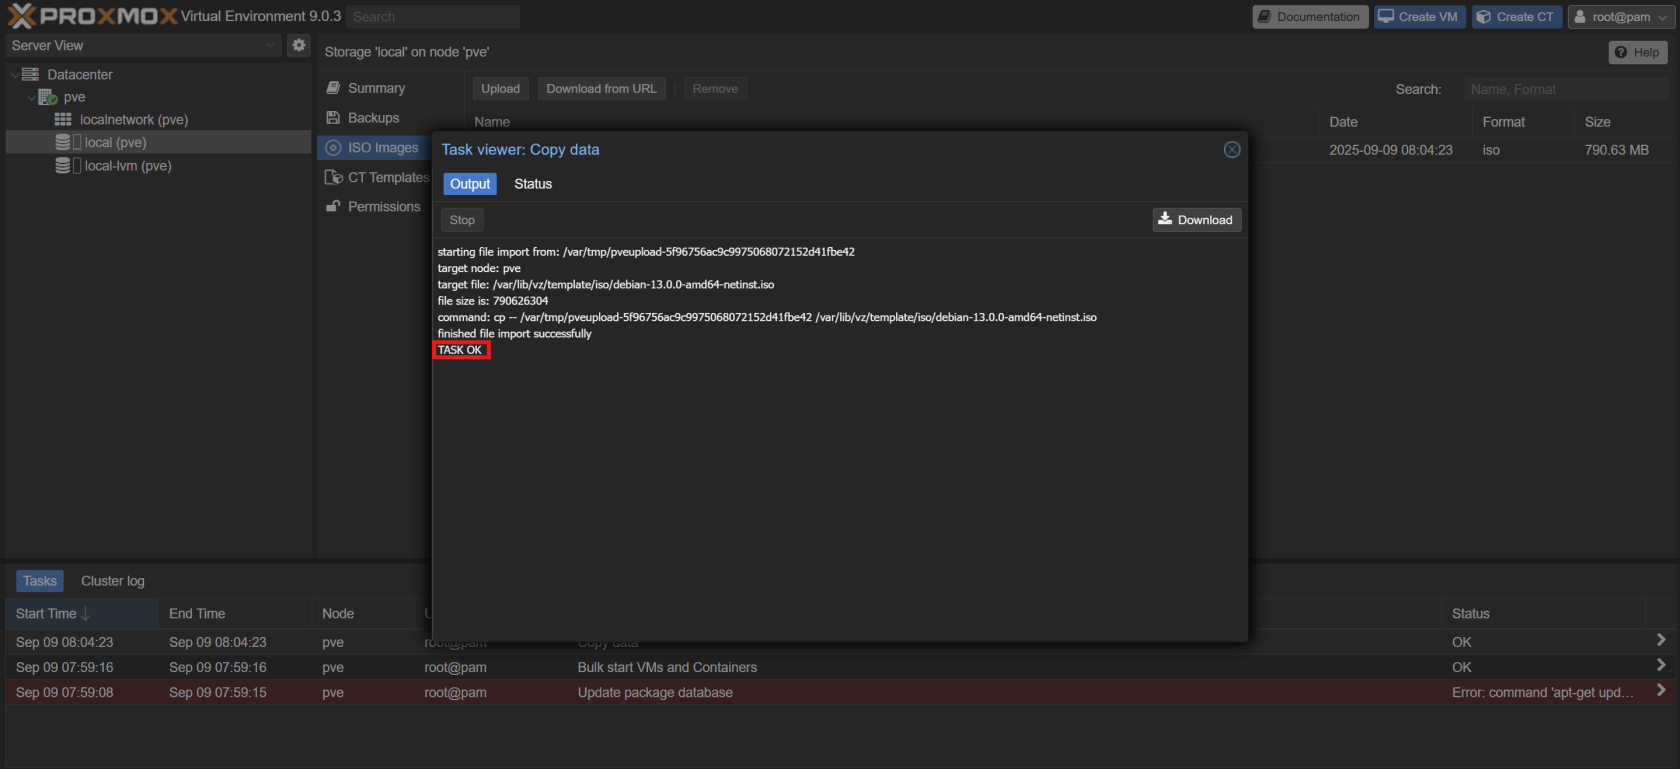
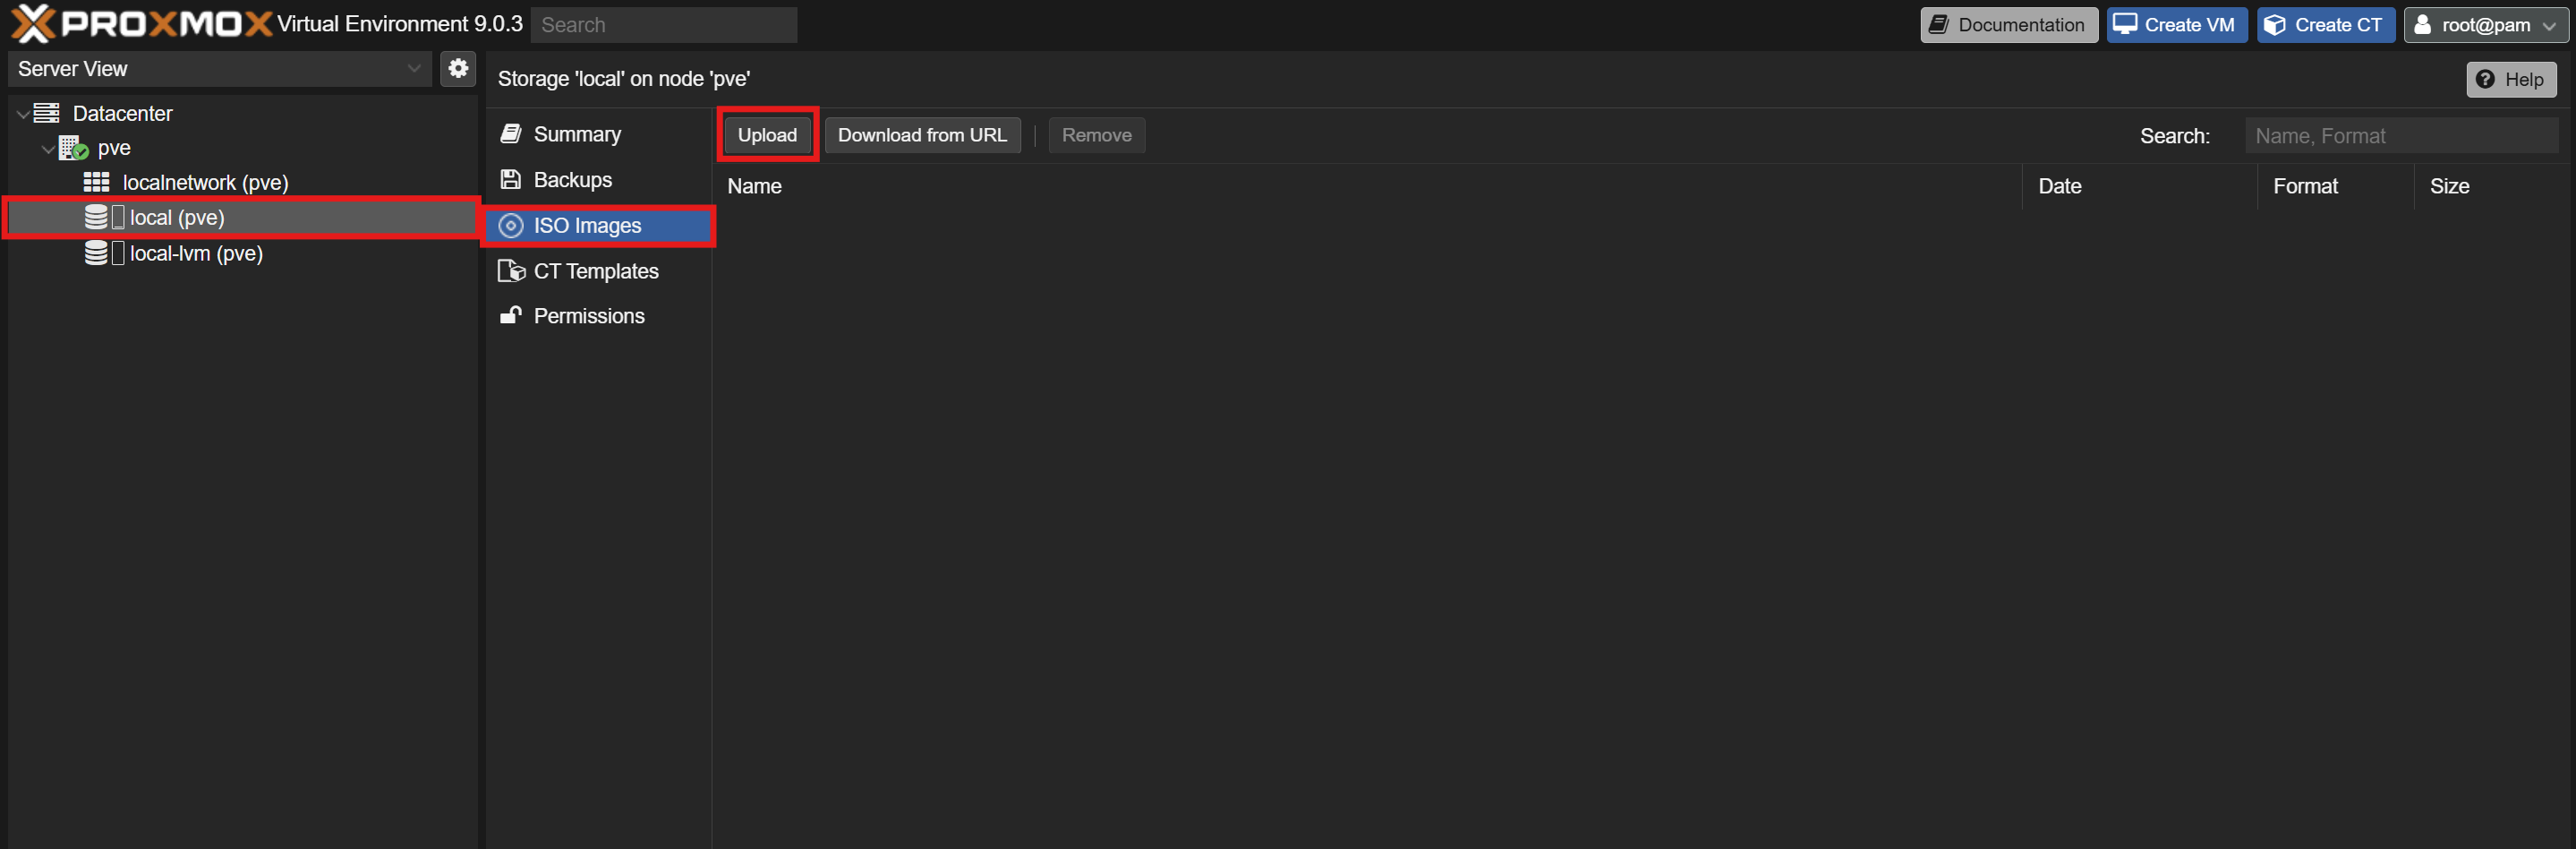
Upload the Debian ISO to Proxmox VE:
- In the Proxmox VE web UI, navigate to your storage and upload the Debian ISO image.

-
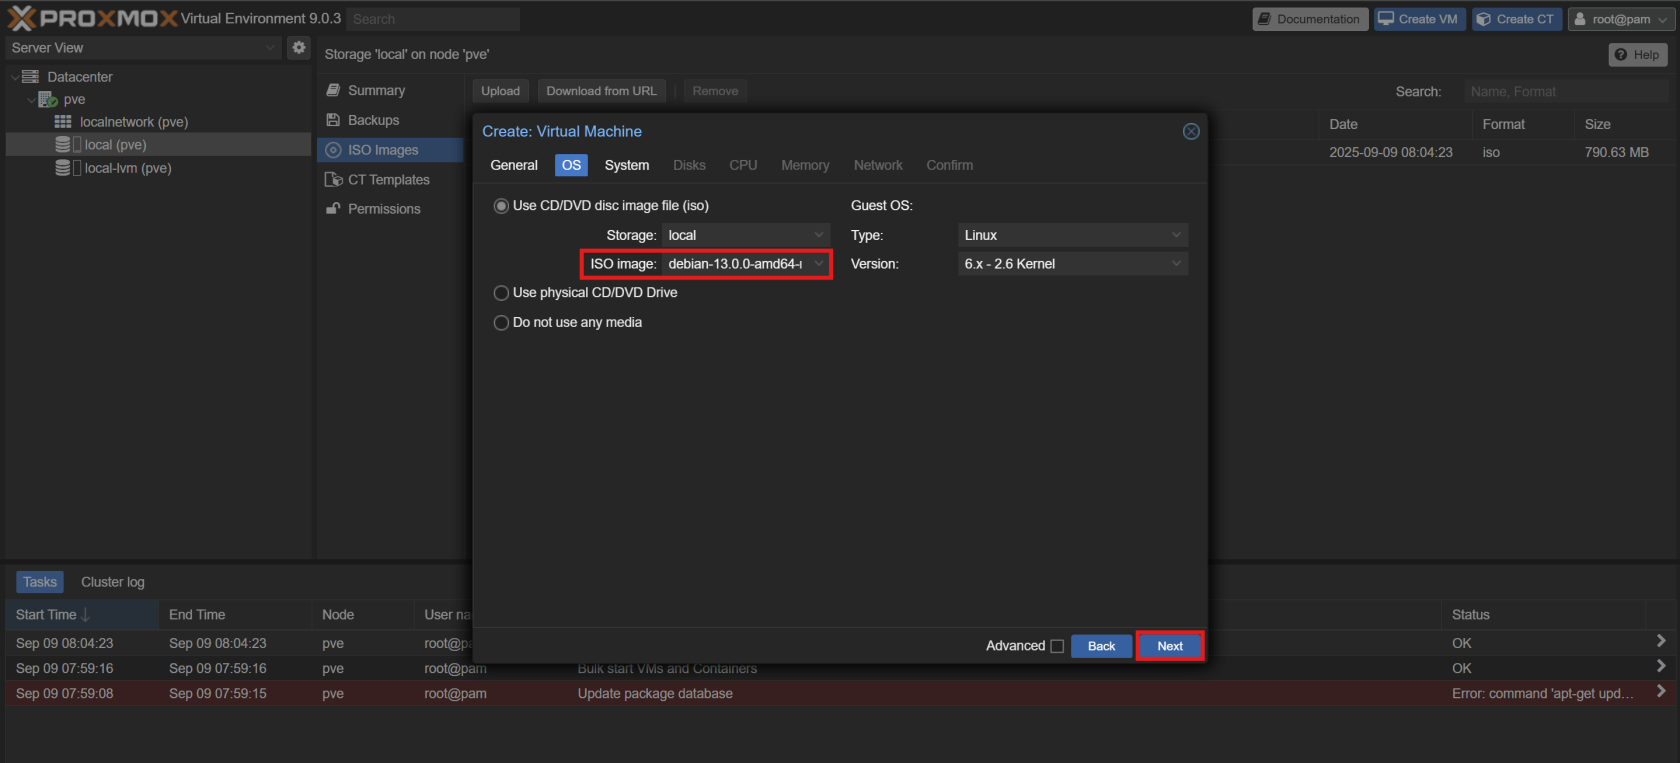
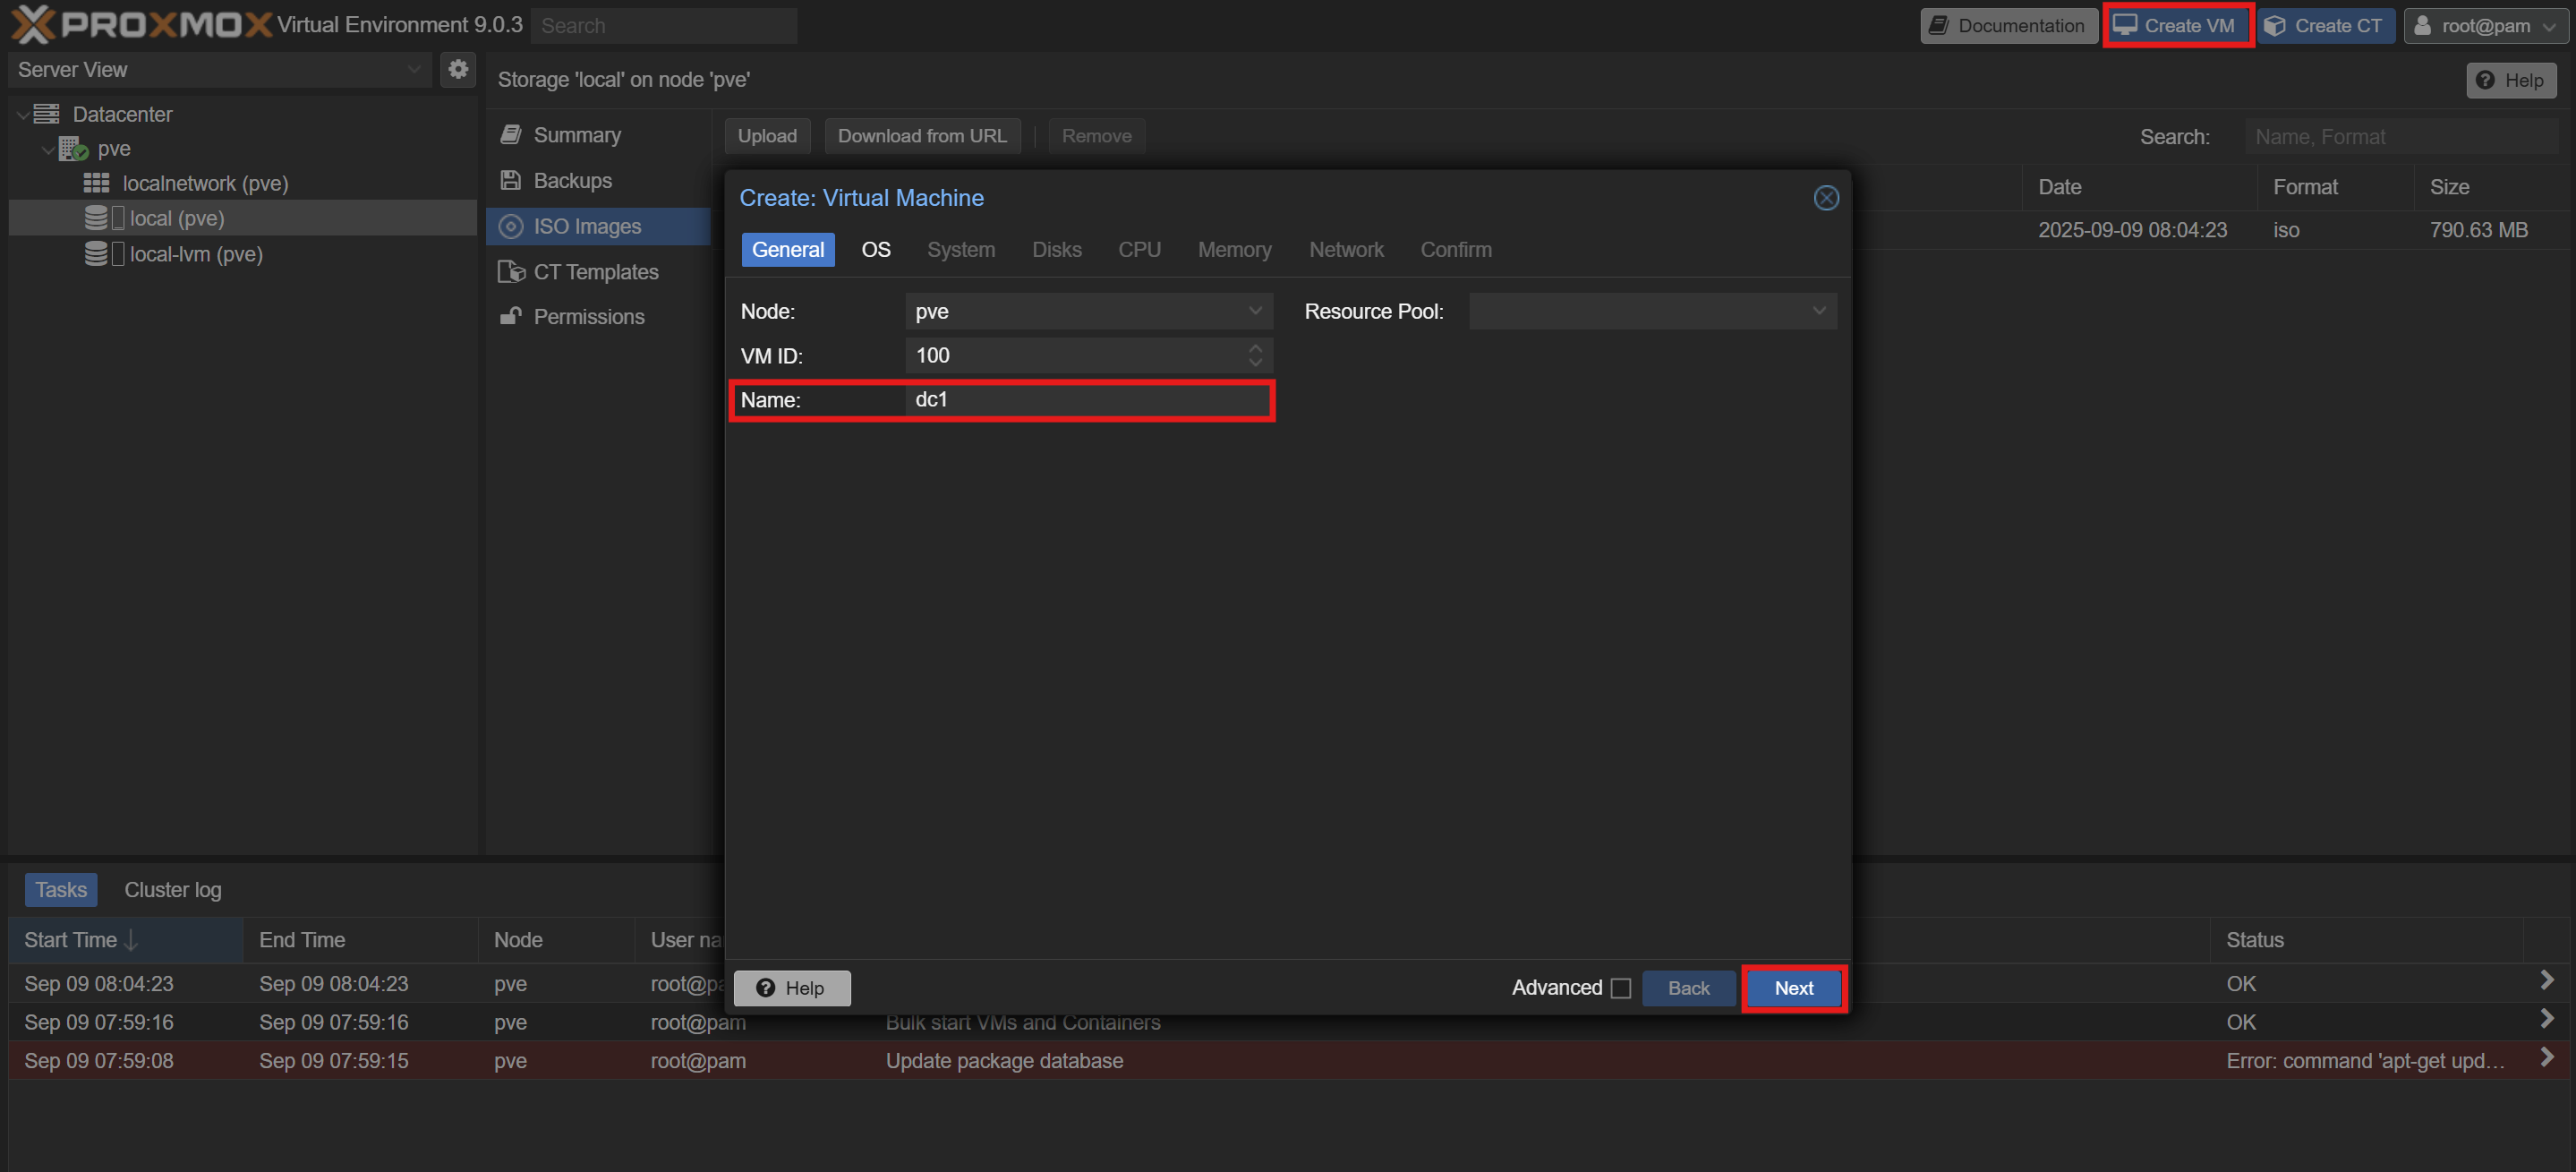
Create a new Virtual Machine with the following specifications:
- OS: The Debian ISO you just uploaded.
- CPU: 2 cores
- RAM: 4 GB
- Storage: 32 GB


2. Initial Setup
- Boot the VM and proceed through the Debian installer.
- A headless installation (without a desktop environment) is recommended to save resources.
- Set the machine name and domain:
- Machine name:
dc1 - Domain:
yourdomain.com
- Machine name:
3. Network Configuration
3.1. Set a Static IP
Edit the /etc/network/interfaces file to configure a static IP address for your domain controller:
auto ens18
iface ens18 inet static
  address 192.168.1.2
  netmask 255.255.255.0
  gateway 192.168.1.1
3.2. Configure DNS
Update /etc/resolv.conf to point to a public DNS server for now. This is necessary to download the required packages.
domain yourdomain.com
nameserver 8.8.8.8
3.3. Verify Hostnames
Check the /etc/hosts file and make sure it is configured correctly.
127.0.0.1       localhost
192.168.1.2     dc1.yourdomain.com dc1

# The following lines are desirable for IPv6 capable hosts
# ::1     localhost ip6-localhost ip6-loopback
# ff02::1 ip6-allnodes
# ff02::2 ip6-allrouters
[!WARNING] Comment out any IPv6 entries to avoid potential issues with Samba.
[!IMPORTANT] Make sure that your local references are also commented or the dc will have a hard time resolving itself and you will experience slower behaviors later on :
#127.0.1.1 dc1.arthuretchloe.fr dc1
4. Installing Required Packages
- Update the system and install the necessary packages:
apt-get update && apt-get full-upgrade -y
apt-get install -y samba winbind libnss-winbind krb5-user smbclient ldb-tools python3-cryptography ldap-utils ntpsec
During the krb5-user installation, you will be prompted for a default Kerberos version 5 realm. You can leave this blank for now.
[!NOTE]
chronycould be used instead ofntpsecfor time synchronization.ntpsecis used here for familiarity.
- Remove the default configuration files to prevent conflicts:
rm /etc/samba/smb.conf
rm /etc/krb5.conf
5. Provisioning the Domain
- Stop the Samba services to avoid interference during the provisioning process:
systemctl stop samba winbind nmbd smbd
- Run the domain provisioning command:
samba-tool domain provision --server-role=dc --use-rfc2307 --dns-backend=SAMBA_INTERNAL --realm=YOURDOMAIN.COM --domain=YOURDOMAIN --adminpass='your-strong-password'
[!IMPORTANT] Arguments Explained:
--use-rfc2307: Store Unix user/group information in LDAP.--dns-backend=SAMBA_INTERNAL: Use the domain controller as the DNS server.
- Copy the generated Kerberos configuration:
cp /var/lib/samba/private/krb5.conf /etc/krb5.conf
- Configure Samba to use your SSL certificates:
- Follow the Managing SSL Certificates guide to create a certificate for your domain controller.
- Add the following lines to your
/etc/samba/smb.conffile under the[global]section:
[global]
    ...
    tls enabled = yes
    tls keyfile = /var/lib/samba/private/tls/key.pem
    tls certfile = /var/lib/samba/private/tls/trusted_chain.pem
    ...
- Activate and enable the
samba-ad-dcservice:
systemctl unmask samba-ad-dc
systemctl enable --now samba-ad-dc
6. DNS Configuration
- Update
/etc/resolv.confto use the local DNS:
nameserver 192.168.1.2
search yourdomain.com
- Set a DNS forwarder in
/etc/samba/smb.conf:
[global]
	...
	dns forwarder = 8.8.8.8
	...
[!Note] Once your AdGuard DNS server is operational, you should update this forwarder to point to its IP address.
- Create a reverse lookup zone:
samba-tool dns zonecreate dc1.yourdomain.com 1.168.192.in-addr.arpa -U Administrator
- Add PTR records for your hosts:
samba-tool dns add dc1.yourdomain.com 1.168.192.in-addr.arpa 1 PTR dc1.yourdomain.com -U Administrator
samba-tool dns add dc1.yourdomain.com 1.168.192.in-addr.arpa 100 PTR pve.yourdomain.com -U Administrator
7. Verification
Reboot the machine and run the following checks:
- Check the Samba configuration:
testparm
- Verify the Kerberos setup:
kinit administrator
You should see a warning about your password expiring.
- Verify the LDAP and SSL setup:
ldapsearch -H ldaps://dc1.yourdomain.com -x -D "Administrator@yourdomain.com" -W -b "DC=yourdomain,DC=com"
You should see a `result: 0 Success` message.
8. Remote Administration
To easily manage your Active Directory domain, you can use the Remote Server Administration Tools (RSAT) on a Windows machine.
- Join a Windows machine to your domain.
- Install the RSAT tools using PowerShell:
Get-WindowsCapability -Name RSAT* -Online | Where-Object State -eq NotPresent | Add-WindowsCapability -Online
Next Steps
Now that your Active Directory domain controller is set up, you can proceed to the next step.
No comments to display
No comments to display