Installing Proxmox
Installing Proxmox VE
This guide will walk you through the process of installing Proxmox Virtual Environment (VE) on your host.
Prerequisites
- A dedicated machine to act as the Proxmox host.
- A USB thumb drive (at least 4GB).
- The latest Proxmox VE ISO image.
Installation Steps
-
Download Proxmox VE: Download the latest release of Proxmox VE from the official Proxmox website.
-
Create a Bootable USB Drive: Use a tool like Rufus to flash the Proxmox VE ISO image to a USB thumb drive.
-
Boot from the USB Drive:
- Insert the USB drive into the host machine.
- Start the machine and enter the BIOS/UEFI settings (usually by pressing the
Delkey on startup). - Configure the BIOS/UEFI to boot from the USB drive.
- Save the changes and reboot.
-
Install Proxmox VE:
- Once the Proxmox VE installer boots, select Install Proxmox VE (Graphical).
- Accept the End User License Agreement (EULA).
- Select the target drive for the OS installation.
- Set your country, time zone, and keyboard layout.
- Choose a strong password for the
rootuser. - Configure the network with the following settings:
- Hostname:
pve.yourdomain.com - IP Address:
192.168.1.100/24(replace with your desired static IP) - Gateway:
192.168.1.1(replace with your router's IP) - DNS Server:
192.168.1.1(replace with your DNS server's IP)
- Hostname:
-
Complete the Installation:
- Review your settings and click the Install button.
- Once the installation is complete, remove the USB drive and reboot the machine.
Accessing the Proxmox Web UI
After the host has rebooted, you can access the Proxmox web UI from another machine on the same network by navigating to:
https://<your-proxmox-ip>:8006
For example: https://192.168.1.100:8006
Log in with the username root and the password you set during the installation.
Configuring Repositories
In order to keep your PVE up to date, you need to update your repositories under your PVE nodes and :
- Disable Proxmox's enterprise repositories (if you don't own a subscription)
- Add the Proxmox
no subscriptionrepository :
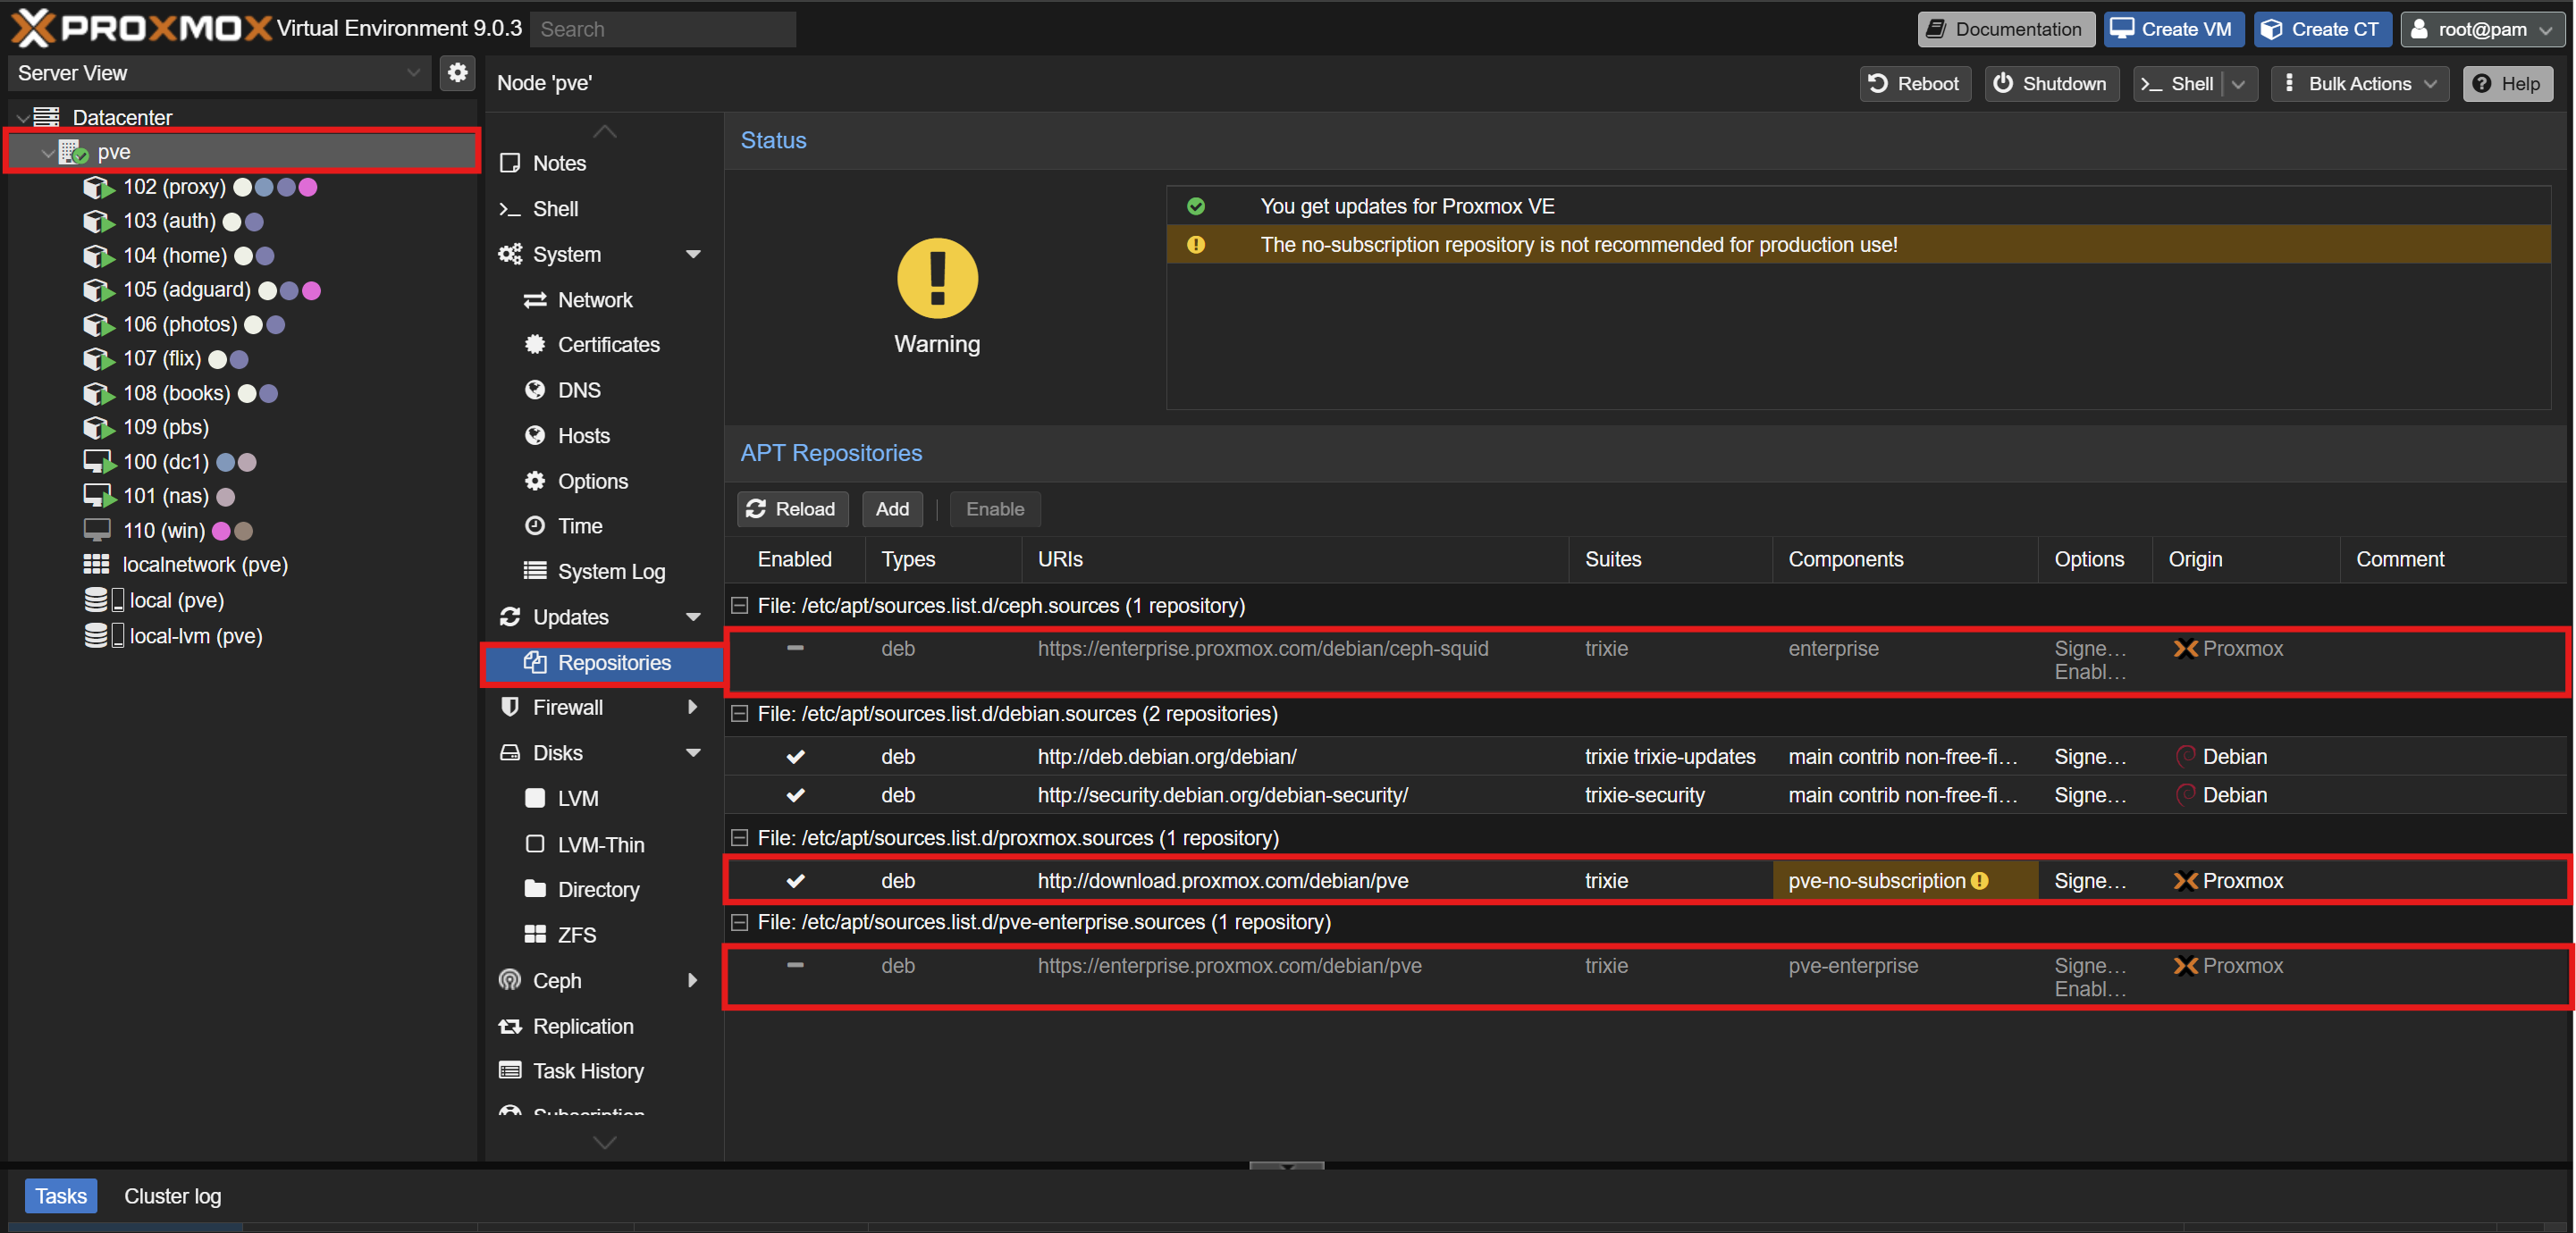
You can nos update and upgrade your PVE.
Next Steps
Now that Proxmox VE is installed, you can proceed to the next step of setting up your homelab.
No comments to display
No comments to display