Truenas
Setting Up TrueNAS
TrueNAS will be used to handle the disk management system of the lab. This guide will walk you through setting up a TrueNAS VM on Proxmox VE, configuring disk passthrough, creating a storage pool, and integrating with an Active Directory domain.
Prerequisites
- A Proxmox VE host up and running.
- The TrueNAS CORE ISO image, which can be downloaded from the official TrueNAS website.
- An existing Active Directory domain controller.
1. Creating the TrueNAS VM
-
Upload the TrueNAS ISO to Proxmox VE:
- In the Proxmox VE web UI, navigate to your storage and upload the TrueNAS ISO image.
-
Create a new Virtual Machine with the following specifications:
- CPU: 4 cores
- RAM: 8 GB
- Storage: 40 GB (for the TrueNAS OS)
2. Configuring Disk Passthrough
To allow TrueNAS to have direct control over the storage drives, we will use disk passthrough.
-
Identify the drives to be passed through:
-
Log in to the Proxmox VE host's shell.
-
Use the
lshwcommand to list the available drives and their IDs:apt install lshw lshw -class disk -class storage -
Take note of the
logical name(e.g.,/dev/nvme1) and theserialnumber of the drives you want to pass through. -
Use the
lscommand to get your drive's idls -al /dev/disk/by-id | grep <logical name>
-
-
Attach the drives to the VM:
-
Use the
qm setcommand to attach the drives to the TrueNAS VM. Replace101with your VM's ID and/dev/disk/by-id/...with the correct disk IDs.qm set 101 -scsi1 /dev/disk/by-id/nvme-WDC_PC_SN720_SDAPNTW-512G-1101_19276E805272 qm set 101 -scsi2 /dev/disk/by-id/nvme-WD_BLACK_SN7100_500GB_250822800106
-
-
Verify the VM configuration:
-
Check the VM's configuration file to ensure the drives have been attached correctly:
cat /etc/pve/qemu-server/101.conf -
The output should contain lines similar to this:
scsi1: /dev/disk/by-id/nvme-WDC_PC_SN720_SDAPNTW-512G-1101_19276E805272,size=500107608K
scsi2: /dev/disk/by-id/nvme-WD_BLACK_SN7100_500GB_250822800106,size=488386584K
-
3. Installing and Configuring TrueNAS
-
Start the VM and install TrueNAS:
- Boot the TrueNAS VM and follow the on-screen instructions to install TrueNAS.
- Once the installation is complete, reboot the VM.
-
Access the TrueNAS Web UI:
- From another machine on the same network, access the TrueNAS web UI by navigating to the IP address assigned to the TrueNAS VM (e.g.,
http://192.168.1.30/). - Log in with the
truenas_adminuser and the password you set during installation.
- From another machine on the same network, access the TrueNAS web UI by navigating to the IP address assigned to the TrueNAS VM (e.g.,
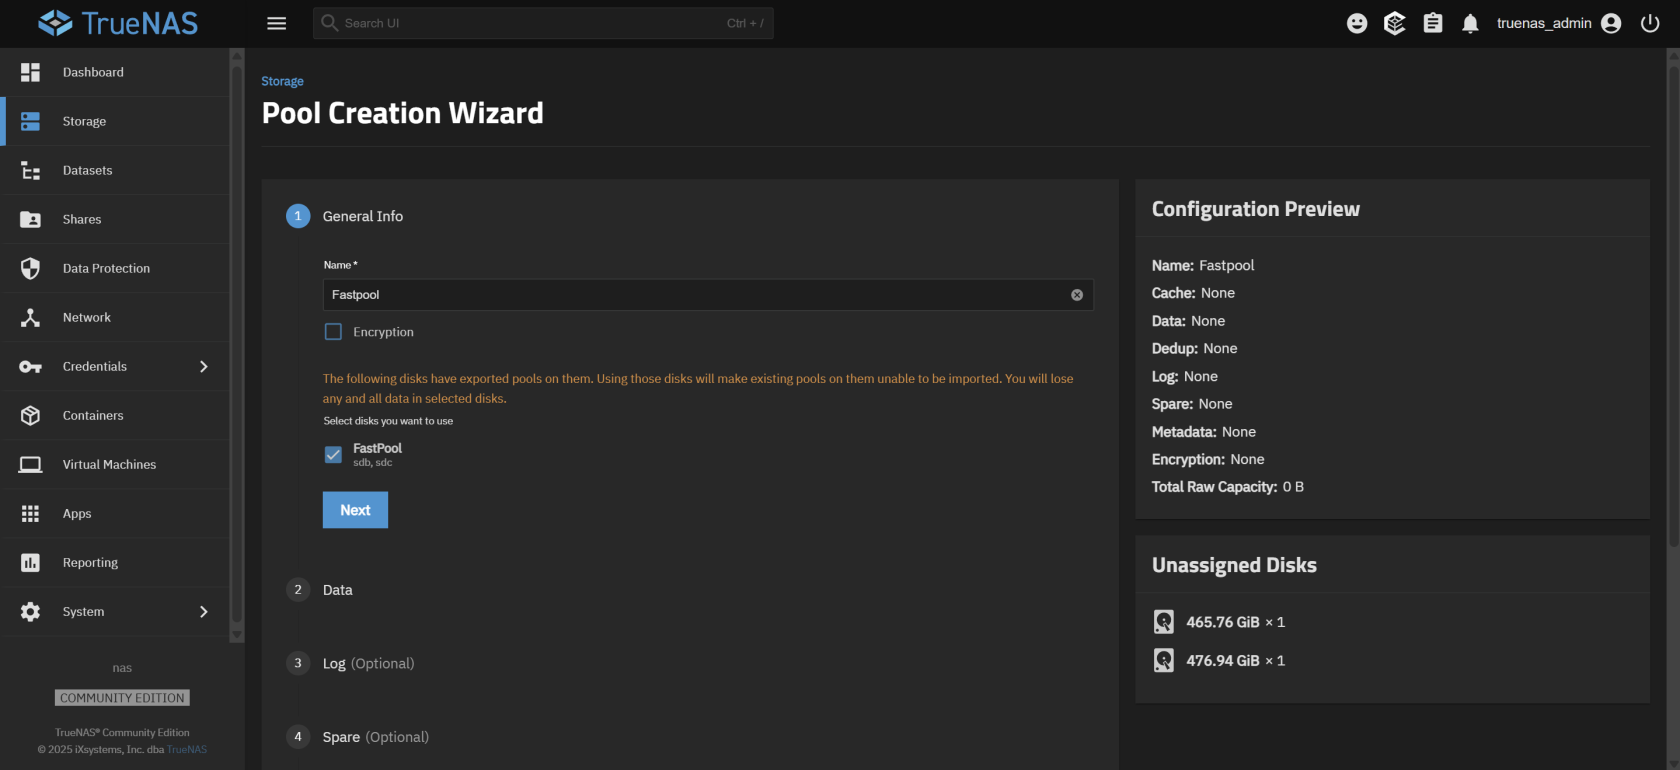
4. Creating a Storage Pool
-
Navigate to Storage and click "Create Pool".

-
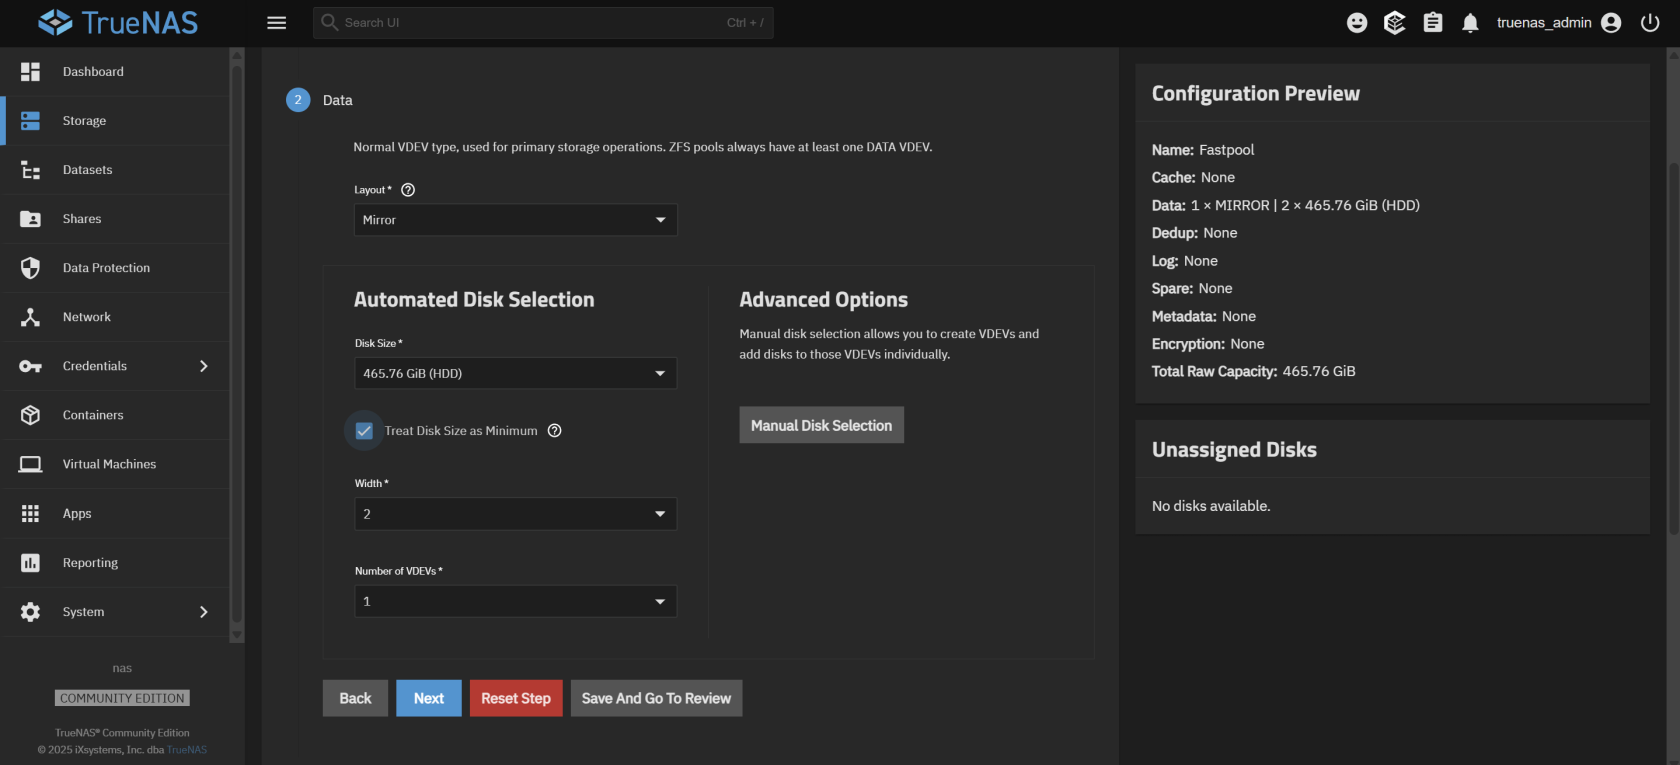
Configure the pool with the following options:
- Encryption: None
- Data:
- Layout: Mirror
- Disk Size: The smaller choice
- Treat disk size as minimum: Checked
- Width: 2 (automatic)
- Number of VDEVs: 1 (automatic)
- Leave everything else empty.
-
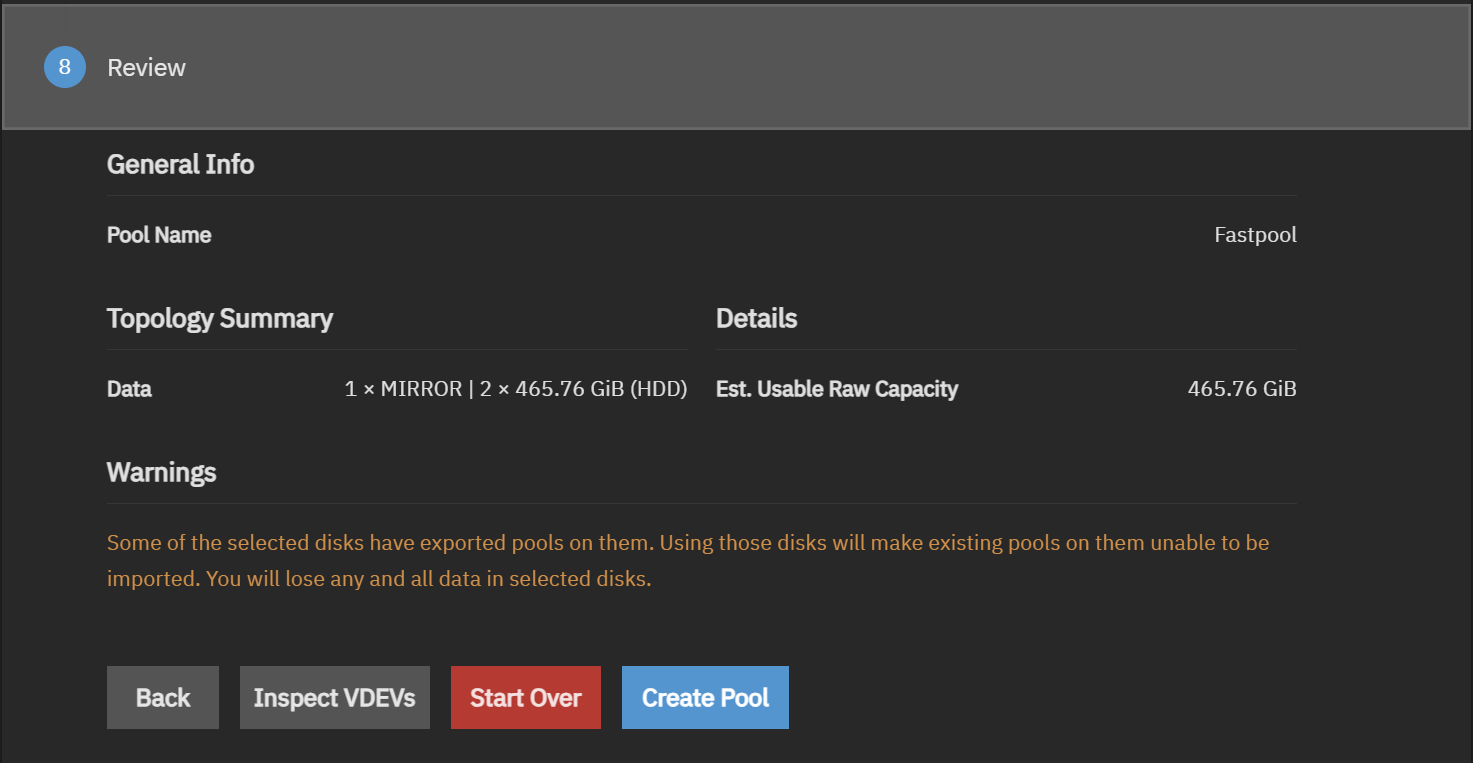
Click "Create pool" to create the storage pool.


5. Joining the Active Directory Domain
-
Create a
truenasuser in your Active Directory:-
SSH into your domain controller and run the following command:
samba-tool user create truenas <password>
-
-
Configure DNS records (optional but recommended):
-
Create PTR and A records for your TrueNAS server:
samba-tool dns add dc1.yourdomain.com 1.168.192.in-addr.arpa 30 PTR nas.yourdomain.com -U Administrator samba-tool dns add dc1.yourdomain.com yourdomain.com nas A 192.168.1.30 -U Administrator -
Verify that the DNS records are working correctly:
host 192.168.1.30
host nas
-
-
Configure Network Settings in TrueNAS:
- In the TrueNAS web UI,. navigate to Network > Global Configuration and set the following:
- Nameserver 1: Your domain controller's IP address
- Domain:
yourdomain.com
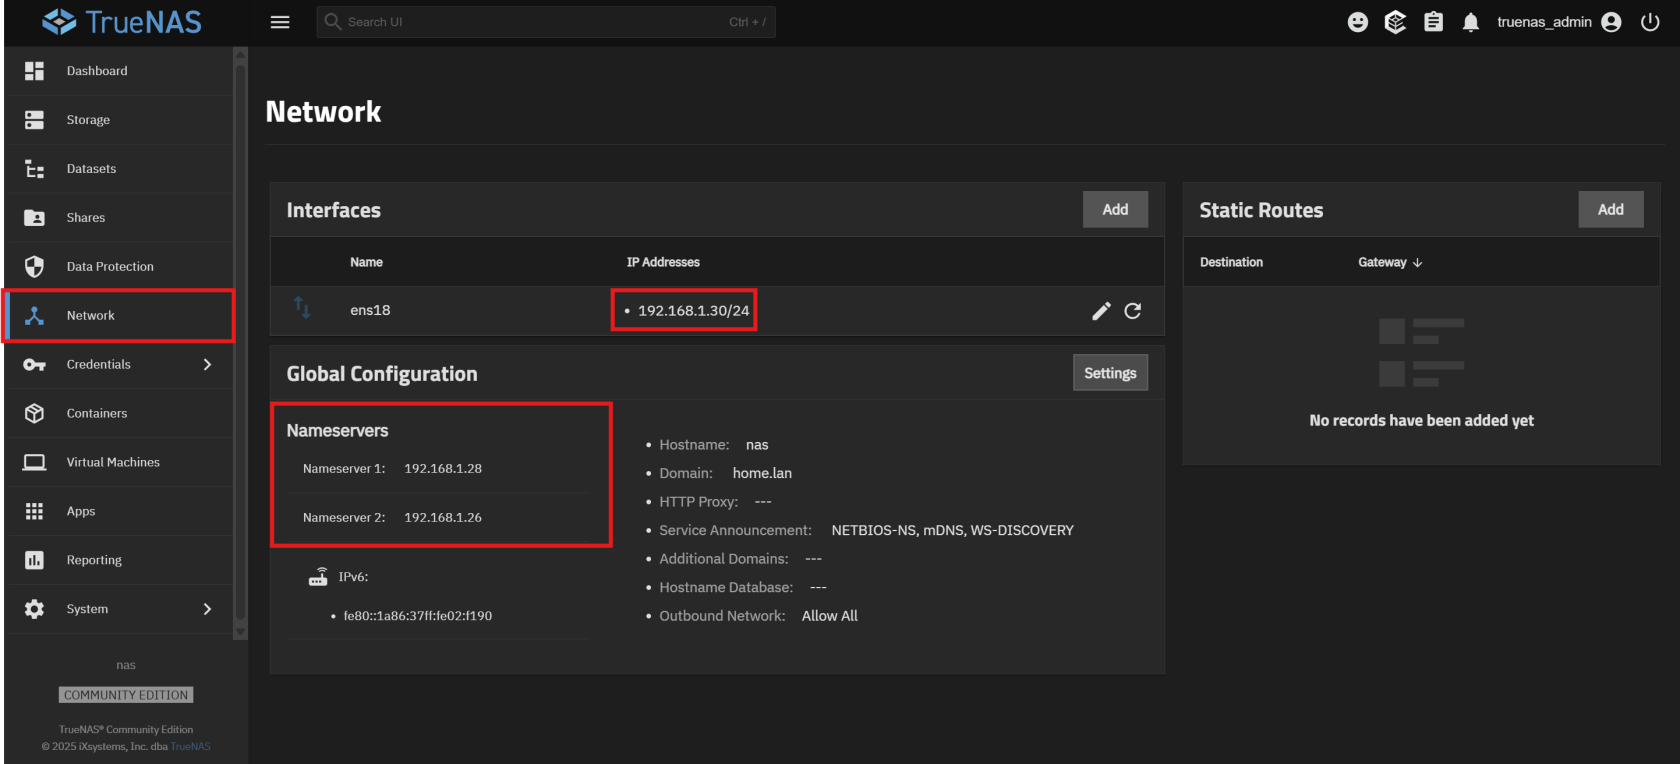
- In the TrueNAS web UI,. navigate to Network > Global Configuration and set the following:
-
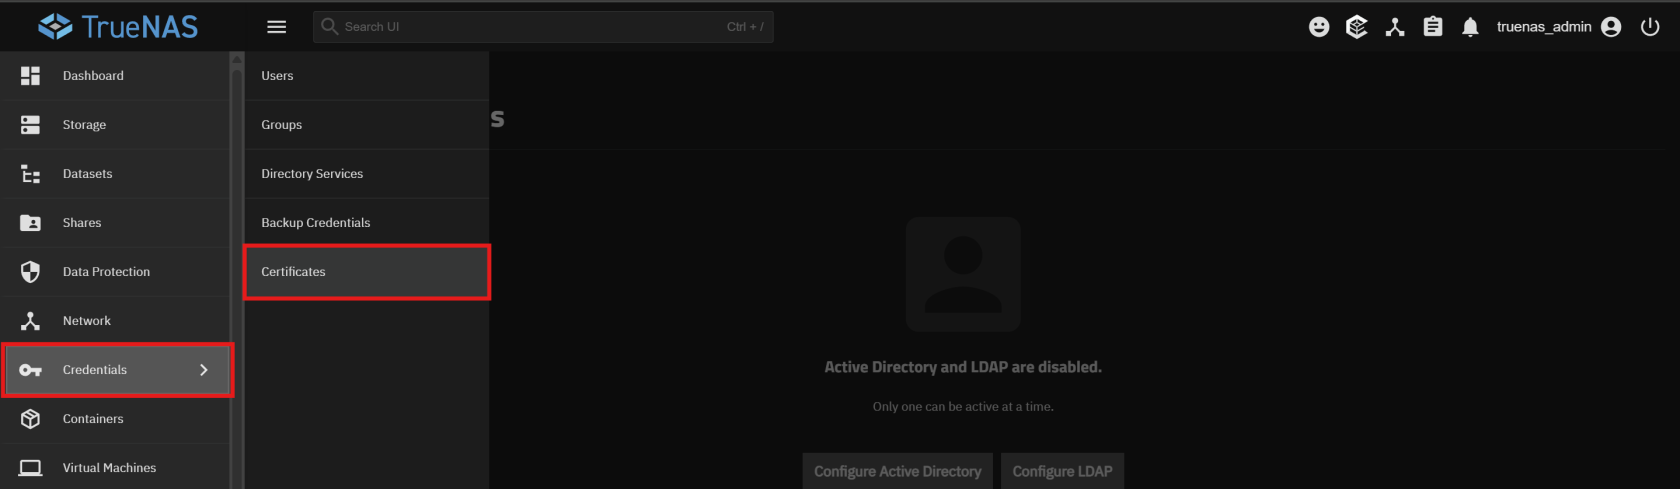
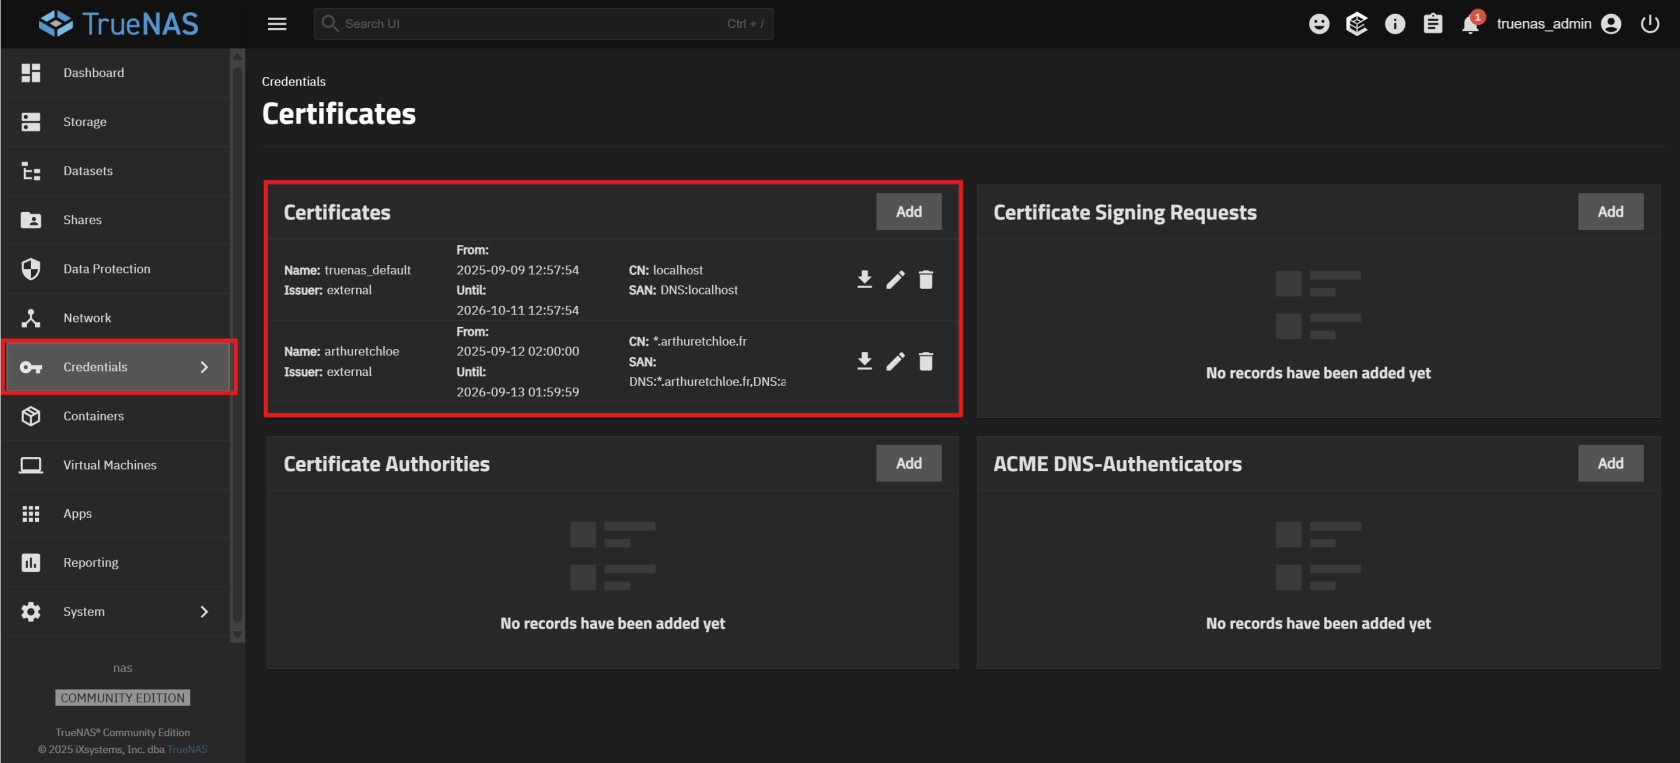
Add certificates for ldaps :
- Navigate to Credentials > Certificates and add your domain certificates.
- Navigate to Credentials > Certificates and add your domain certificates.
-
Join the Active Directory Domain:
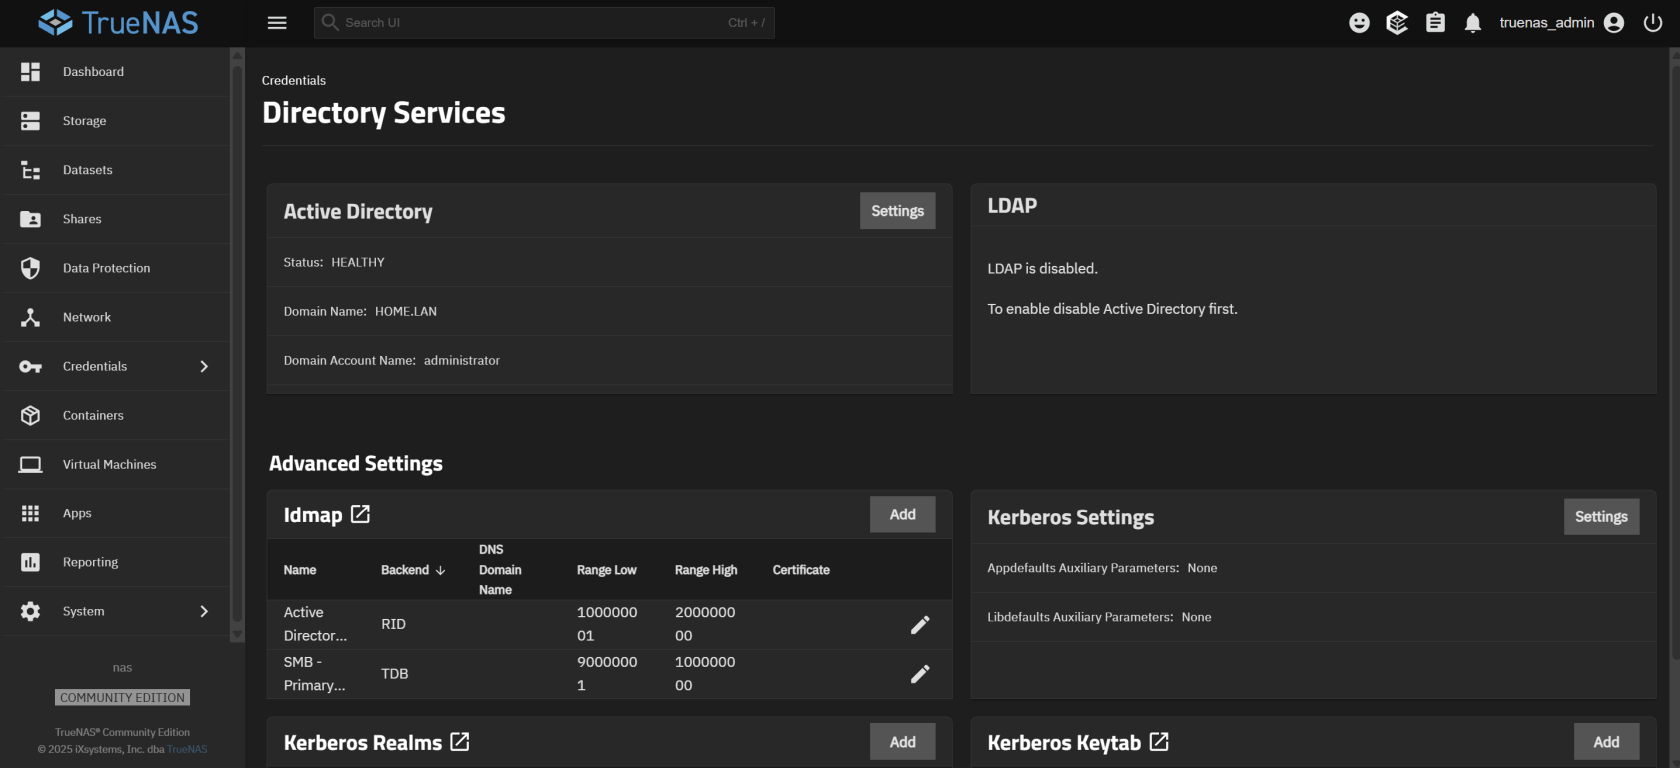
- Navigate to Directory Services > Active Directory and click Join Domain.
- Enter your domain name and the credentials for the
truenasuser.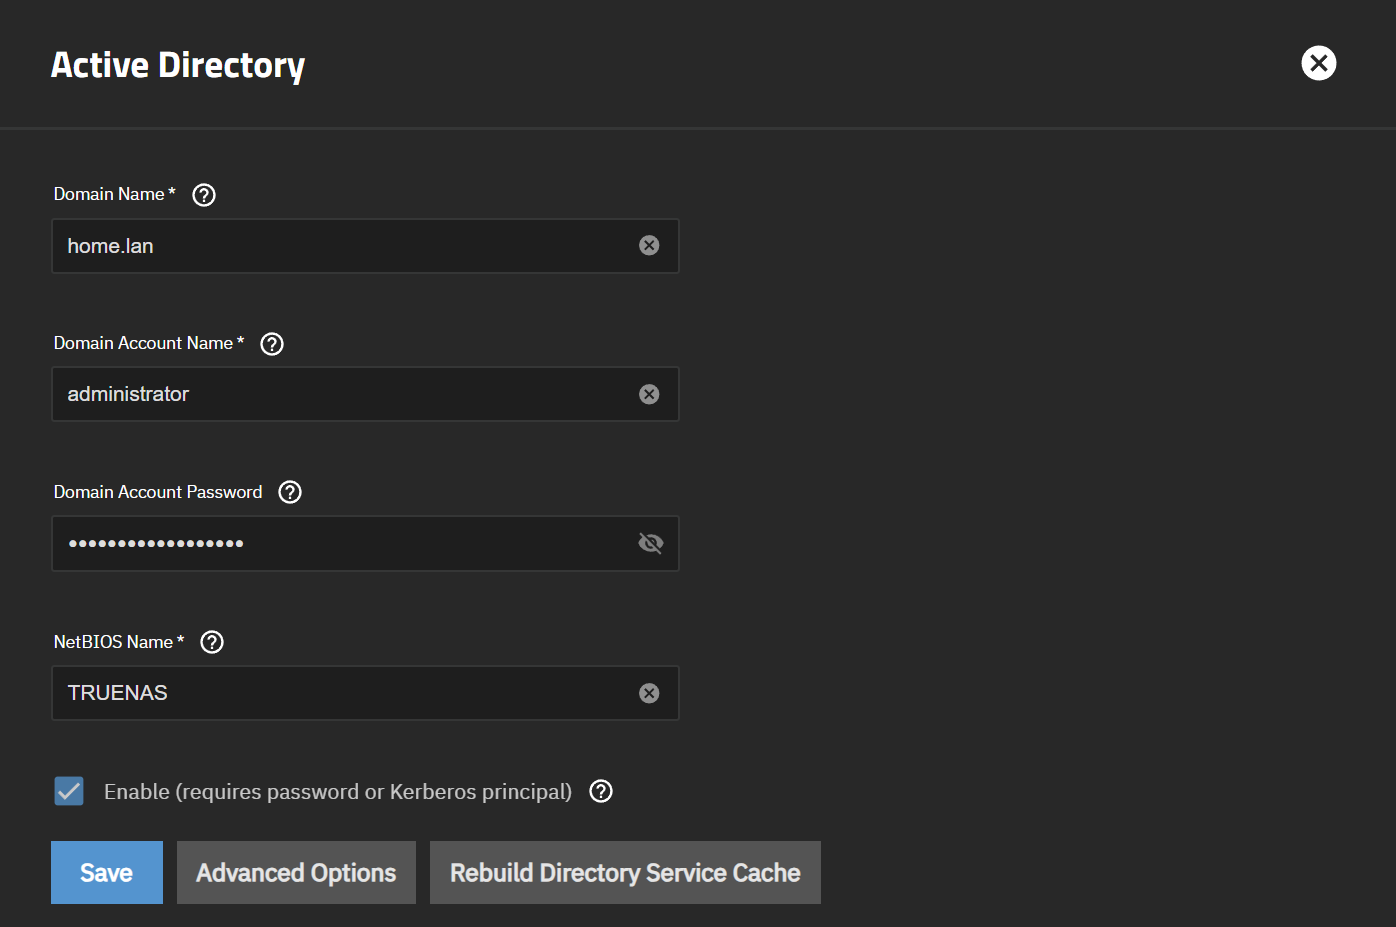
[!IMPORTANT] If you encounter the error
Error: allow_dns_updates No server IP addresses passed DNS validation., you can bypass it by un-checking Enable DNS updates under Advanced Options.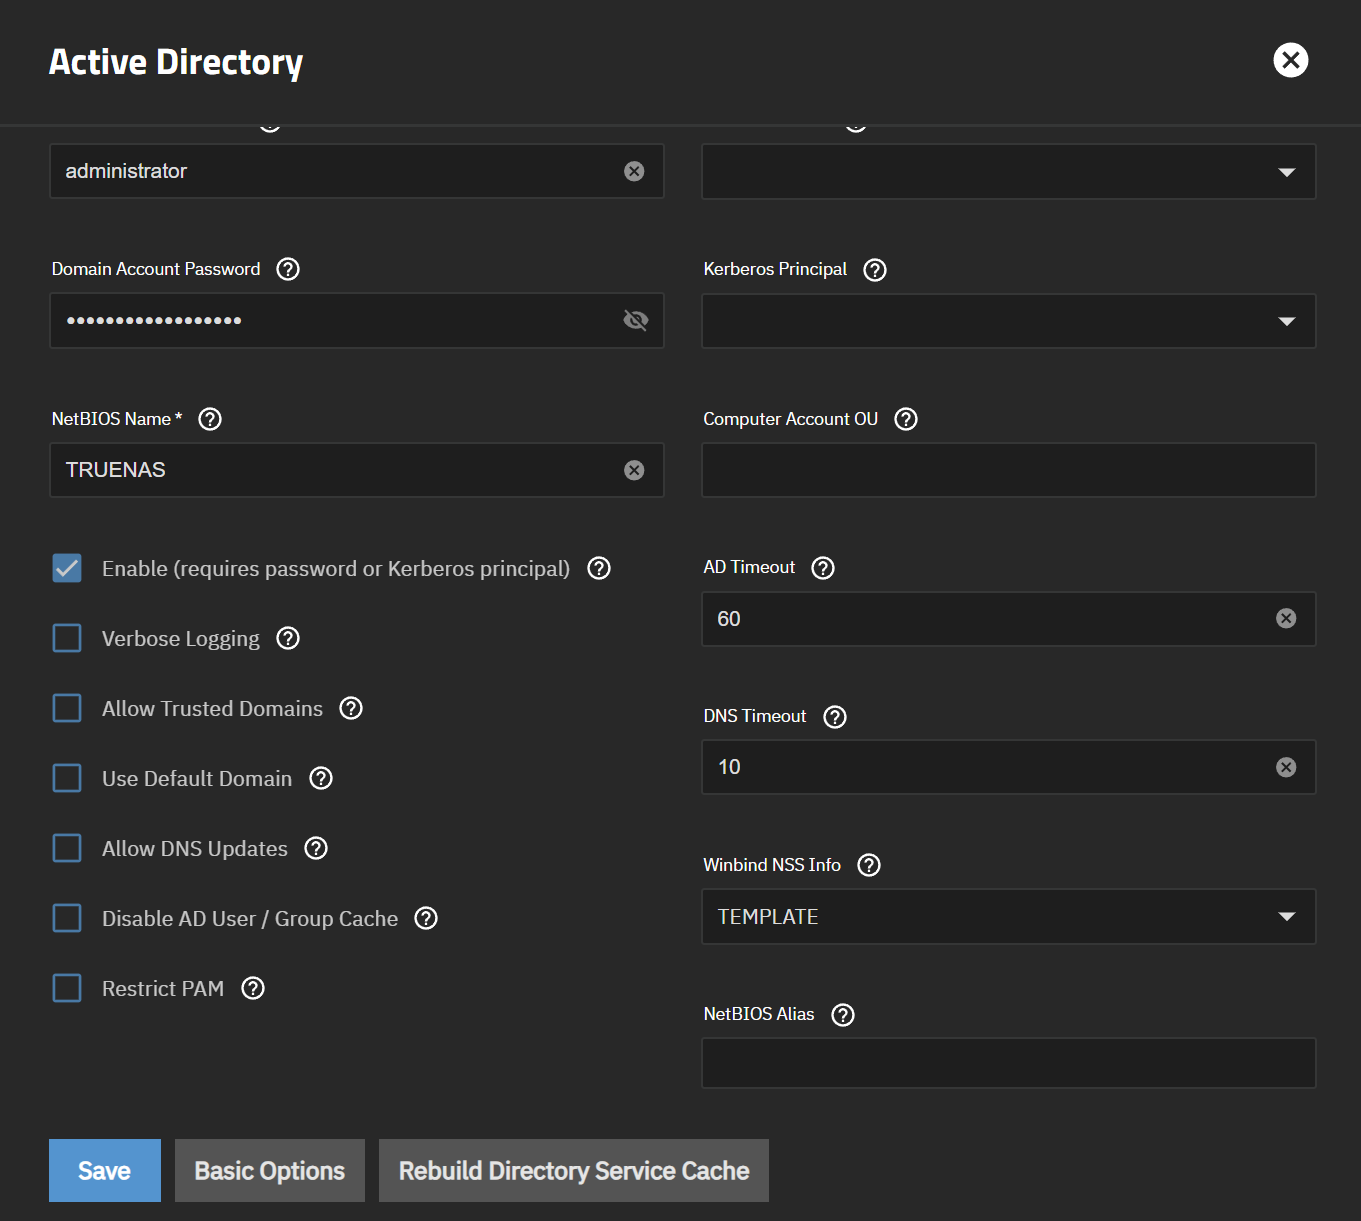
-
Verify the connection:
- Once the process is complete, you should see that TrueNAS is part of the Active Directory domain.


Next Steps
Now that TrueNAS is set up and configured, you can proceed to the next step of setting up your network services.
No comments to display
No comments to display